With summer coming up, now is the ideal time to start getting your outdoor living space spruced up and looking great. If you�re planning on laying outdoor porcelain tiles but you�re by no means a tiling expert, don�t worry � we�ve got you covered.
We�ve put everything we know into this simple step-by-step guide for beginners on how to lay outdoor porcelain tiles, including the best tools for the job and some extra tips for completing the job flawlessly.
Follow these instructions, and you�ll have a beautiful outdoor space in no time!
Before You Start�
Before you jump into laying your beautiful new outdoor porcelain slabs, you need to make sure you have everything in order. Here are some key things to keep in mind before starting your project:
Materials, Tools, & Safety Equipment List
Laying outdoor porcelain tiles requires careful preparation and the right materials. Here�s a comprehensive list to ensure you’re well-prepared for your project:
| Materials: – Outdoor porcelain tiles: Choose quality tiles suitable for outdoor conditions. – Tile adhesive: Opt for a flexible, waterproof adhesive designed for outdoor use. – Grout: Select weather-resistant grout; consider a colour that complements your tiles. – Primer: A quality primer will ensure better adhesion of the tiles to the base. |
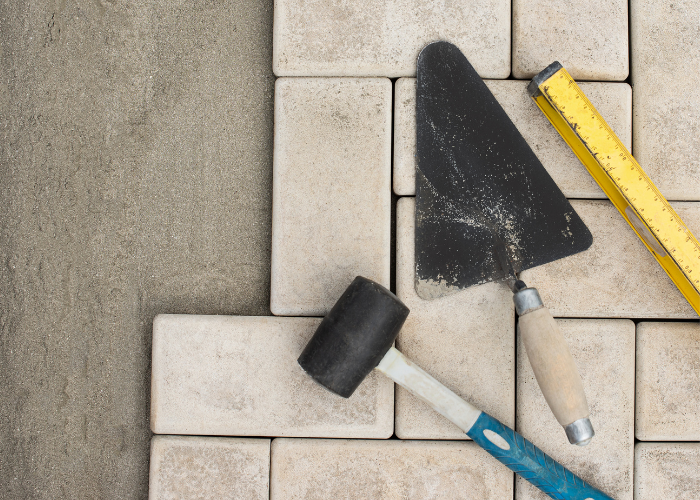
| Tools: – Notched trowel: For applying adhesive. – Tile cutter: To size the tiles appropriately if needed. – Rubber mallet & tile spacers: To place tiles evenly and ensure they are firmly set. – Level: To ensure your tiles are laid evenly. – Grout float: To apply and smooth grout between the tiles. – Mixing paddle & bucket: For mixing adhesive and grout. |
| Safety Equipment: – Safety glasses: To protect your eyes from dust and debris. – Gloves: To protect your hands while handling tiles and mixing adhesive. – Knee pads: To protect your knees when laying tiles and applying grout. |
Choosing the Right Laying Pattern
Choosing the right laying pattern for your outdoor porcelain tiles involves considering both aesthetics and functionality.
Straight lay, where tiles align edge to edge, creates a modern, uniform look. For added texture and interest, a staggered (brick bond) pattern may be preferred.
Herringbone patterns introduce dynamic movement, ideal for pathways or accent areas.
Keep in mind the size of your outdoor space; larger patterns can make small areas appear spacious, while intricate designs may suit larger spaces better.
Finally, consider the tile shape; rectangular tiles offer more pattern options than square tiles.
Preparation Needed for Laying Your Outdoor Tiles
Preparation is crucial for a successful outdoor porcelain tile installation. The first step is to ensure the base is solid, level, and clean.
Remove any debris, plants, or old paving materials to create a smooth surface. If you�re laying tiles over an existing concrete surface, check it for cracks or imperfections that could affect the tile adhesion.
Calculating the “Fall”
An essential aspect of preparation is calculating the “fall” � the gradient needed to ensure water runoff.
Proper drainage is crucial to prevent water accumulation, which could lead to slippery tiles or, over time, damage to the tiles or sub-base.
To calculate the fall, aim for a gradient of at least 1 in 80 (which equates to a 1.25% incline).
This means for every 80 centimetres horizontally, there should be a 1-centimetre drop vertically. Use a long level and measure from the highest point of your area to the lowest, ensuring there’s enough slope to facilitate water runoff.
| Note: Patios should never be flat. Failing to create a “fall” will result in surface water sitting on your patio, causing a safety issue and increasing the risk of damage. |
Laying Your Outdoor Porcelain Tiles
Once you’ve prepared the area, it’s time to move on to the installation phase. This is where things get more technical, but we’ve tried to make this guide as simple as possible so you can follow it for your DIY project.
| Feel free to get in touch with our tiling experts for further advice on laying your tiles or to see how we can help! |
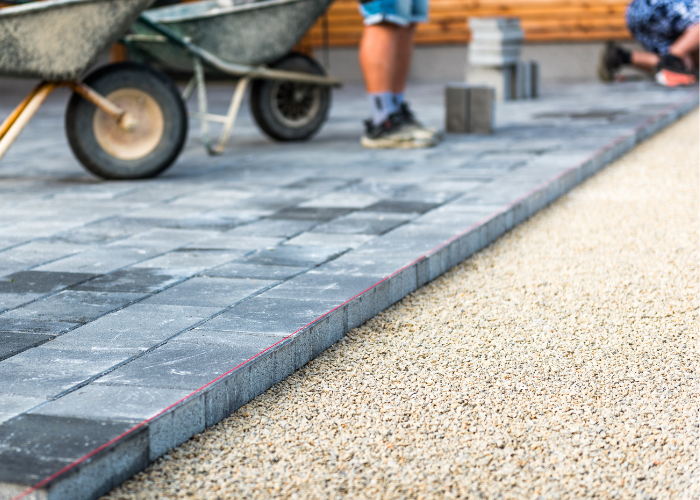
Step 1: Lay Your Sub Base
When laying a new patio, a solid sub-base is crucial to prevent cracks and prolong its lifespan.
First, check your current surface. If it’s uneven or gets waterlogged, you definitely need a new sub-base.
Next, lay a geotextile membrane. This will prevent your sub-base materials from mixing with the ground, help with drainage, and protect your patio from water damage.
To create a strong sub-base for your patio area, there are two materials you need:
- Compacted layer of hardcore (crushed stone): Without concrete, start with at least 100 mm of hardcore. This makes a stable base so your patio won’t shift under pressure.
- A layer of mortar or concrete: After the hardcore, add a layer of mortar or concrete to give your tiles a solid, even base. Aim for a thickness of at least 50mm for stability.
Check with a spirit level to make sure your sub-base is solid and level. This will avoid future tile problems like cracking.
Taking the time to do your sub-base right will result in a great-looking, long-lasting outdoor space.
Step 2: Set Out String Lines
Setting out string lines is an essential step in ensuring your outdoor porcelain patio slabs are laid accurately and uniformly. This process involves stretching a string between stakes to outline the borders and grid pattern of your patio.
| Why Use String Lines? – Alignment & uniformity: String lines serve as a visual guide to ensure all tiles are aligned both horizontally and vertically, maintaining the chosen pattern across the entire patio. – Slope & drainage: They help mark out the calculated “fall” for water runoff, which is crucial for preventing water from pooling on the patio’s surface. – Space planning: String lines allow you to visualise the final layout and make any necessary adjustments before laying the tiles, reducing the likelihood of costly mistakes. |
How to Set Out String Lines
- Stake the perimeter: Begin by driving wooden or metal stakes around the perimeter of the area where the patio will be laid. The stakes should extend beyond the patio’s actual size to ensure complete coverage.
- Mark the “fall”: Use a long level or laser level to mark the gradient on your stakes. This will be your guide to ensure the string follows the necessary slope for water drainage.
- Attach & stretch the string: Tie a durable string to the stakes, following the marks for the gradient. Ensure the string is taut and level across the entire area, forming a grid pattern if necessary to align tiles within specific areas or patterns.
- Double-check measurements: With the strings in place, use a tape measure to check the distances between the lines, ensuring they match the dimensions of your tiles plus any space required for grout lines. Adjust if necessary.
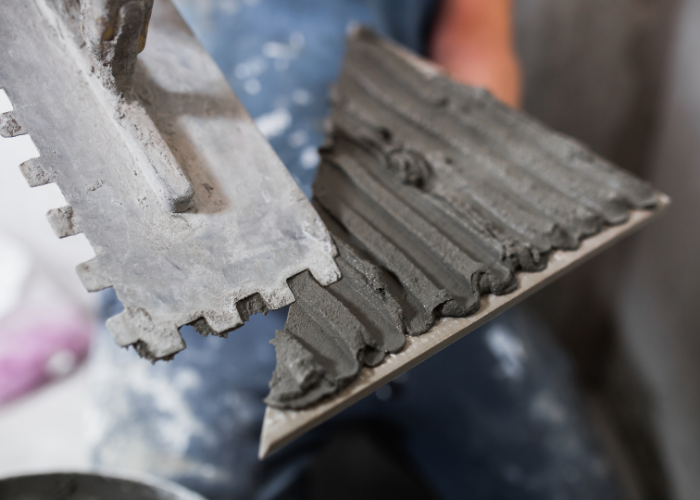
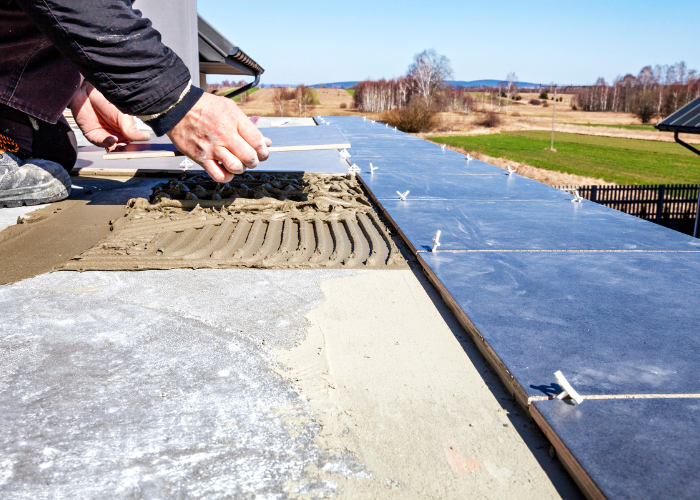
Step 3: Lay a Full Bed of Mortar
Laying a full bed of mortar is the next crucial step for installing your outdoor porcelain tiles.
Begin by mixing the mortar according to the manufacturer�s specifications, achieving a consistency that is neither too wet nor too dry. It should be able to retain a ball shape when squeezed together.
Apply a generous layer of mortar directly onto your prepared sub-base, aiming for a thickness of approximately 30-50mm.
Use the flat side of your trowel to spread the mortar evenly, then, using the notched side, create grooves in the mortar. These grooves help the tiles adhere better and ensure an even level once laid down.
| Top tip: Make the mortar as level as possible. Porcelain is unforgiving when it comes to tamping down the slabs to create a level surface. |
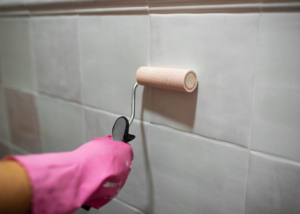
Step 4: Prime Your First Tile
Priming your first tile is crucial for ensuring strong adhesion to the mortar. Start by applying a thin, even layer of primer to the back of the tile using a masonry brush or roller.
The primer improves the bond between the tile and mortar, reducing the risk of tiles becoming loose or lifting over time. It also helps in preventing moisture from seeping underneath, which can cause damage in the long run.
We recommend using the Kerakoll Primer A Eco Solvent Free Water-Based Primer 5kg. Because your patio is likely to be close to your lawn or flower beds, this eco-friendly primer packs a punch while protecting our environment from harmful substances.
| Top tip: Only apply the primer to the tile immediately before laying the tile. If it dries, it won’t work properly. |
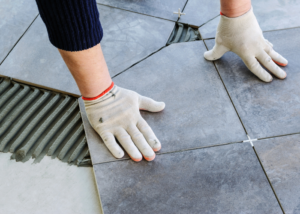
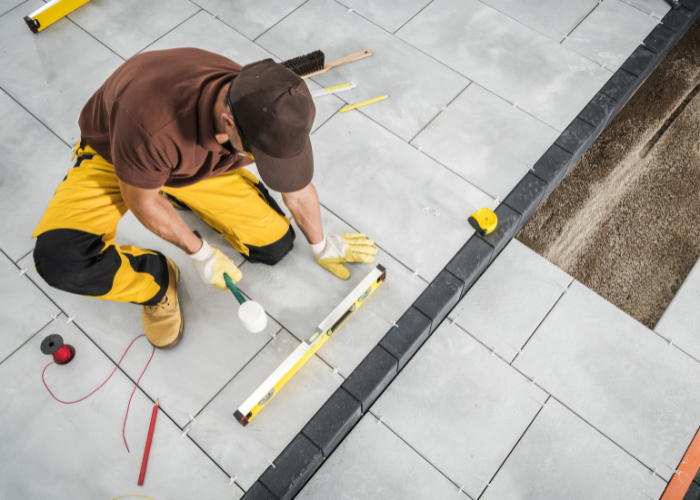
Step 5: Lay Your First Tile
With the mortar ready and your first tile primed, carefully position the tile at your chosen starting point, guided by the string lines for accuracy.
Gently place the tile onto the mortar bed, ensuring it aligns with your layout plan. Press down lightly on the tile, using a rubber mallet to tap it firmly into place, ensuring it is level with adjacent tiles.
Use tile spacers around its edges to maintain consistent gap distances for grout. Check the level across the tile and adjust as necessary before the mortar begins to set.
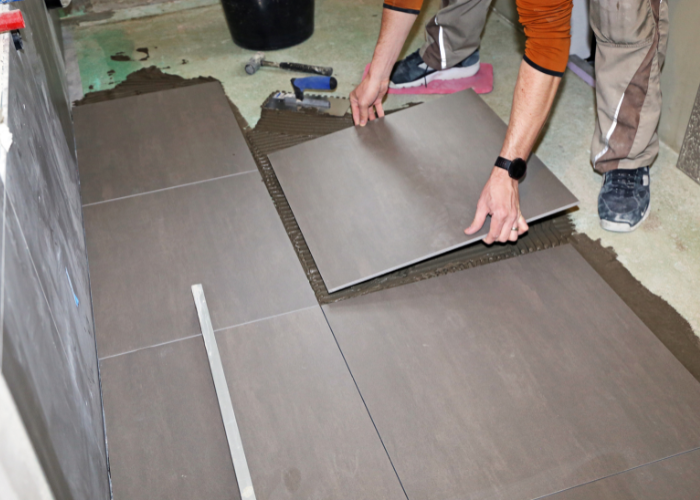
Step 6: Space & Lay the Rest of the Tiles
Continuing from your first tile, lay the rest, ensuring each is evenly placed and aligned. Make use of tile spacers to make sure you’re leaving appropriate gaps. Adjust the spacing as needed to make sure they are consistent.
| Top tip: Don’t walk on the tiles for at least 24 hours to prevent dislodging the tiles before they’re set properly. |
Grouting Outdoor Porcelain Tiles
Once you’ve laid your tiles and the mortar has fully dried, you need to grout them to keep the patio looking professional and neat.
We recommend the Ultra Tile ProGrout Flexible (3kg) grouting mix. This grout is designed for areas susceptible to movement or vibration, making it ideal for outdoor patio spaces.
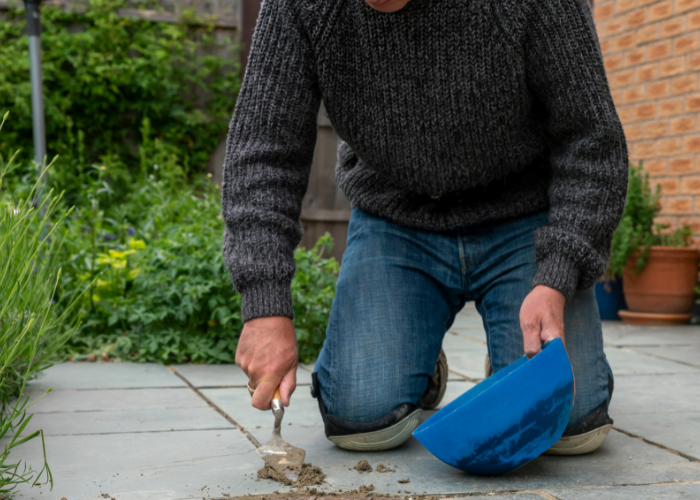
Wet Method
The wet grouting method efficiently fills gaps between outdoor porcelain tiles.
- Start by cleaning the porcelain tiles to remove debris.
- Mix the grout to a creamy consistency.
- Pour it on the tiles, using a rubber float or squeegee at a 45-degree angle to push grout into the joints.
- Once the excess is removed and a light haze forms (around 2 hours), rinse with water and a clean sponge, being careful not to disturb the grout in the joints.
Dry Method
The dry grouting method involves spreading a dry mix of sand and cement over the surface of the tiles and then sweeping it into the joints.
Once the mixture is in place, a gentle mist of water is applied to activate the cement, causing it to set and harden.
This method is quick and efficient, which is ideal for large areas. Care must be taken to ensure the mix is evenly distributed and that excess is fully removed to prevent staining.
This method is particularly suitable for fine gaps and offers a straightforward clean-up process.
Although the grouting process includes clean-up, there are always bits that get missed in the moment. The Lithofin KF Grout Cleaner 500ml (Ceramic & Porcelain) is ideal for getting rid of messy bits of grouting to give your patio a professional finish.
Tips & Tricks for Laying Porcelain Paving
Here are some of our top tips and tricks for laying porcelain paving tiles and getting a professional finish the first time.
Make Sure You Have a Solid Sub Base
A solid sub-base is the foundation of a durable and stable patio. It ensures that your porcelain tiles remain level and crack-free despite weather changes or heavy use.
Without a robust sub-base, tiles can shift, sink, or rise due to ground movement and water damage. This can result in uneven surfaces, creating a tripping hazard and compromising the aesthetic and functional integrity of your outdoor space.
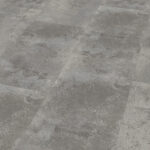
Use the Right Tiles
Choosing the correct type of porcelain tiles not only ensures durability and resistance against weather conditions but also complements your outdoor aesthetic.
Tiles suited for outdoor use prevent slipping, withstand freeze-thaw cycles, and maintain their appearance, guaranteeing safety and beauty for years to come.
Cutting Your Porcelain Slabs
Cutting your porcelain slabs allows for precise fitting around edges, corners, and obstacles to achieve a professional finish.
Always use a diamond-blade wet saw for clean, accurate cuts that reduce tile damage. Measure and mark your cutting line carefully to ensure accuracy.
Cutting is essential for creating a seamless look, ensuring tiles fit perfectly within your designated space and optimising tile usage by minimising waste.
| Top tip: There’s no shame in outsourcing this part of the process if you don’t have the right equipment or the confidence to do this yourself. |
Summary: Laying Porcelain Tiles Outside
Laying porcelain tiles outdoors enhances your space with durability and aesthetic appeal. By following these steps, you can achieve a professional-looking patio that will last.
If you need any support or advice when it comes to laying your tiles, our expert team are always happy to help! Give us a call or send us an email, and we�ll be glad to assist you.
Read our guide on how to keep your outdoor porcelain tiles clean and well-maintained for a long-lasting and beautiful outdoor space!
FAQs
Yes, porcelain tiles can be laid on a sand and cement mixture, but it’s crucial to ensure a solid, stable sub-base. Sand and cement should be mixed at a 4:1 ratio, creating a firm bed that provides durability and longevity for the tiles.
The best base for porcelain tile is a well-compacted sub-base of crushed stone topped with a layer of mortar. This combination ensures stability, longevity, and resistance against movement and weather conditions, providing a durable foundation for your porcelain paving.
Yes, porcelain tiles require a polymer-modified mortar designed specifically for porcelain’s low porosity. This type of mortar ensures a strong bond and long-term durability, preventing tile lifting or cracking.
Yes, a geotextile membrane under porcelain tiles is recommended. It separates the sub-base from the soil, prevents weed growth, and aids in drainage, enhancing the overall stability and longevity of the paved area.